Tuesday, June 12, 2018

Organizing

Summer is the perfect time for organizing. I love things that are neat and tidy and in their place. With that said, I don't have many of those places around here. This summer I am committed to organizing those spaces behind closed doors that aren't seen very much. It makes a huge difference. While organizing our medicine cabinet I found three opened bottles of Aleve. If only we had been organized we could have avoided that!
I made these cute labels, now let's see if anyone uses them when putting stuff away.

Saturday, June 9, 2018

Brew Room Beginnings

Eric has been working on his brew room since we've finished my sunroom. It is slow going and a lot of the work he's been doing won't be visible in the finished room. So here's a look at where things stand right now.

Notice the wires running to electrical boxes at various heights to accommodate his equipment. The new water lines at the lower left are in under the old water lines. A brand new wall vent on the lower right. And the drain and waterproofing in the middle of the floor, in case of spills.
Since I'm taking it easy right now (due to some health issues I'm not getting into) this is where I can sit and supervise the work.

Our Last High School Graduation

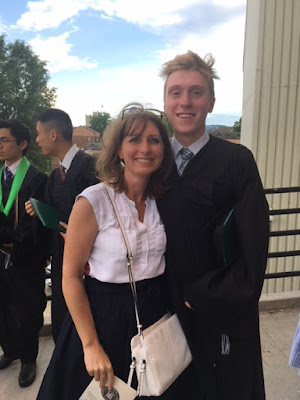
Just a few posed pics from Caleb's graduation: May 18, 2018
With Mom

With Grandma and Grandpa

With sisters

With the young folks

With the family. All grown up.

Sunday, April 29, 2018

Travertine Floor
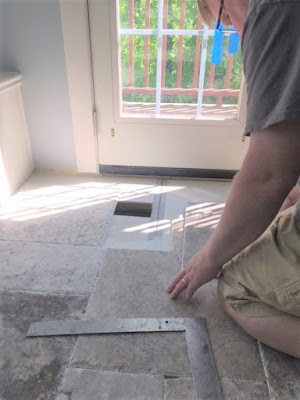


Eric did the measuring and cutting. I didn't get a picture of his new tile saw. I don't know why the old tile saw wasn't good enough, but now we have two tile saws.

I did all the tile laying. It is a good workout! The difference between laying travertine tile and ceramic tile is that it is dry fit together, or doesn't have grout between the tiles. This actually made the process go much quicker, but it has to be more precise. There is no wiggle room to adjust with a thick or thin grout line. I only broke one tile during the whole job. (Eric broke two by stepping on ones that were not set in place yet.)

The room was pretty straight-forward. The vent was the only thing that need an intricate cut.

We will need to put a sealant on the whole floor and there are some holes and chipped corners than need filled in also.


I've started stocking the shelves. Thanks for the offer, but I think these will fill up pretty quickly just with what we have laying around the house!

The only things left to do are baseboards, window coverings, a chair, rug, and replacing the chandelier with a ceiling mount light to allow for tall people to walk through. We are saving the chandelier to use on the back porch when we expand it (next summer?!?).

Saturday, April 21, 2018

Bookcases and Window Seat

When we first started this project, I sort of led Eric to believe that I was getting a plain square box to sit in and read. Then I mentioned the windows and he went for it, and was even excited by how nice they looked. The window seat was something else that I always envisioned having in here, but Eric didn't realize it until he had already put in electrical boxes. Maybe I forgot to tell him? I think I was afraid he would consider it too much extra work and cost.
I mentioned the bookcases pretty early on, but again it was after we started the project. In my mind, I had all this planned out ahead of time, but I fed it to Eric in baby steps and eventually got everything just the way I wanted it.

The little half-wall at the end of the window seat was a bit of a problem. Neither of us could figure how to connect the two pieces together and so Eric just built it in.

I actually would have been happy with much less substantial bookcases. However, once Eric gets started on a project he has to do it 110%. These shelves are not going anywhere and will not be easy for anyone who may want to remove them in the future.

The little details, like caulking every crevice, filling every hole and painting tops bottoms and sides of every shelf seemed to take forever!

Wow! I can't believe I have this in my home. It is so amazing!

Notice the bead board on the bottom of the window seat and below the bookshelf. This ties into our breakfast room and brings a little continuity to the house. I also have requested every window in the house receive this trim. Eric pieced it together with various trim and 1by material. I think it looks fantastic! The cushions aren't on the window seat because I was so excited to share the results that I took a picture while the paint was still wet. Next up, the floor...


Saturday, April 7, 2018

Window Cushions- Finishing

No pictures of the sewing or stuffing the cushions into the covering.
These cushions are supposed to be a French mattress style, so I started by sewing around all the edges to give it that "finished" look.

Next came the tufting. To make it easier to stitch through the cushion, I clamped it together after marking the front and back.

Using a large needle, made just for this purpose, and a leather thimble it wasn't too difficult to sew through the cushion. It was a little tricky to hit the mark on the back side.
Adding the buttons to the top was the last step before removing the boards. Those creases came out pretty quickly.

The large cushion finished. Ignore the windows here. This is before the trim was put in place.

This is the final effect. Actually in this picture the smaller cushion wasn't complete. Our local Jo-Ann's ran out of buttons, so I couldn't finish this until I bought more at another store over spring break. But you get the idea. They look a little hard, but they are very comfortable. I think in person they look better than here. For some reason it is always cloudy, rainy, or dark when I take pictures. This room really gets a lot of sun in the morning.


Window Cushions- Planning and Prepping

Since sewing is "my thing" there are quite a few pictures of the process of making the cushions. I'll have to separate it into two posts to get it all on here.
The first step was ordering the foam off the internet. It came in this tiny box and I was a little worried I had ordered the wrong thing. But when I opened it it popped out, like one of those snakes in a can. It was hilarious and got the project off to a fun start!
The foam cushions are covered with batting for extra softness.

I used newspaper to make a pattern. The whole project was something I found on Pinterest, only the one on there was a small two-foot cushion and mine are 7 1/2 feet and four feet.

The larger cushion wouldn't fit on the table, so I took over the floor. You can see the seam down the middle of the drop cloth I bought on Amazon. It was a little tricky to work around that seam and get all the fabric in solid pieces. This would be a good time to add that this was the second drop cloth I ordered. The first one I washed and dried, which is what I always do with fabric before I sew. Unfortunately, the drop cloth bleached out to a pinkish color and shrunk over 4 inches. I may use it to make art smocks for my kiddos at school.

Making the buttons was so satisfying. It is hard to imagine that it is going to work, and then you pop it out and it's a perfect fabric-covered button. I had to make 22 for the cushions and then I made two extra because I had them in the package. I may make pillows later.

Cute as a button!